Step 1 (open screen)
Select Pre-Flight Briefing > Route PIB. The Route PIB screen appears.
Route PIB Screen
Step 2 (define briefing options)
The system allows you to enter filter criteria concerning the message types that you want to have included in the PIB.
Message Type
You may select an additional message type or types that you want to have included in your PIB: SNOWTAM, ASHTAM and/or BIRDTAM); these are optional. However, standard NOTAM will be included every time. Additionally you may select to have METEO and/or miscellaneous information available in your PIB.
Briefing Type
Briefing type lets you choose which kind of NOTAM you wish to have included in your PIB: international, national and/or military NOTAM. One of the check boxes must be selected (if none are selected, an error message will be raised).
Flight Rules
The system requires you to select one of the flight rules.
IFR stands for Instrument Flight Rules. A flight conducted in accordance with the Instrument Flight Rules is an IFR flight.
VFR stands for Visual Flight Rules. A flight conducted in accordance with the Visual Flight Rules is a VFR flight.
The third option is a combination of IFR and VFR.
Step 3 (define Aerodromes)
Define the Departure Aerodrome, Destination Aerodrome, and, optionally, Alternate Aerodromes.
In the Identifier field enter the ICAO location indicator
of the aerodromes and click the ![]() button. On the lower left side of the Aerodromes section, Total
displays the current number of aerodromes.
button. On the lower left side of the Aerodromes section, Total
displays the current number of aerodromes.
The ICAO location indicator of aerodromes consists of a four-letter code. |
If you do not know
the ICAO location indicator, click on the ![]() button. The Search Aerodromes
page appears and allows you to search for an aerodrome. You can search
for an aerodrome by ICAO code, IATA code, FIR code, the aerodrome name
or the type of aerodrome (aerodrome, heliport, landing site). Enter part
of the ICAO code (for example, LO or ED) or the other fields and click
Search. All aerodromes that meet the entered search criteria are
displayed.
button. The Search Aerodromes
page appears and allows you to search for an aerodrome. You can search
for an aerodrome by ICAO code, IATA code, FIR code, the aerodrome name
or the type of aerodrome (aerodrome, heliport, landing site). Enter part
of the ICAO code (for example, LO or ED) or the other fields and click
Search. All aerodromes that meet the entered search criteria are
displayed.
Note:
If part or all of an aerodrome
ICAO code was entered prior to clicking the ![]() button, the ICAO Code search field in the search window will be pre-filled
with what was already entered in the respective form field.
button, the ICAO Code search field in the search window will be pre-filled
with what was already entered in the respective form field.
Search for aerodromes.
Click on the aerodrome you want to add to your PIB. The selected aerodrome appears in the aerodrome list.
Step 4 (define FIRs)
It is possible to get default FIRs based on the departure and destination aerodromes that you have entered above by clicking Get Default FIR.
To add FIRs manually,
enter in the Identifier
field the ICAO location indicator
of the FIR(s) for which you want to generate the PIB and click the
![]() button.
Below the FIRs table, Total
displays the current number of FIRs.
button.
Below the FIRs table, Total
displays the current number of FIRs.
The ICAO location indicator of FIRs consists of a four-letter code. |
If you do not know
the ICAO location indicator, click on the ![]() button. The Search FIRs page
appears and allows you to search for a FIR. You can search for a FIR by
ICAO code or the FIR name. Enter part of the ICAO code (for example, LO
or ED) or the other fields and click Search. All FIRs that meet
the entered search criteria are displayed.
button. The Search FIRs page
appears and allows you to search for a FIR. You can search for a FIR by
ICAO code or the FIR name. Enter part of the ICAO code (for example, LO
or ED) or the other fields and click Search. All FIRs that meet
the entered search criteria are displayed.
Note:
If part or all of an FIR ICAO
code was entered prior to clicking the ![]() button,
the ICAO Code search field in the search window will be pre-filled with
what was already entered in the respective form field.
button,
the ICAO Code search field in the search window will be pre-filled with
what was already entered in the respective form field.

Search for FIRs.
Click on the FIRs you want to add to your PIB. The selected FIR appears now in the FIR list.
Step 5 (define validity)
From time is calculated on the basis of the client time. The client time is converted to UTC time according to the set time zone. To time displays the From time plus 24 hours.
Define the time range for which you want to have NOTAM included in the PIB. All NOTAM and messages of other selected message types that are valid within the selected time range will be included in the PIB.
To define the From
and To dates, either
type in the values manually or use the Calendar pop-up. To call
the Calendar pop-up, click the ![]() button. Select
a month and day and click OK. The entered date must be the current
date or a date in the future.
button. Select
a month and day and click OK. The entered date must be the current
date or a date in the future.
Step 6 (generate PIB)
To generate the Route PIB, click on the Generate button. The PIB lists NOTAM by aerodromes.
The header of the PIB displays some of the selected filter criteria, for example:
Generation date and time of the bulletin in UTC
Selected Validity time period of PIB in UTC
Selected Service Type
Selected Flight Rules (either IFR, VFR or IFR/VFR)
Message types included in the PIB
Selected FIR(s)
Selected aerodromes
Contents of PIB
Selected briefing type(s)
A disclaimer is included at the end of the PIB and for each empty section.
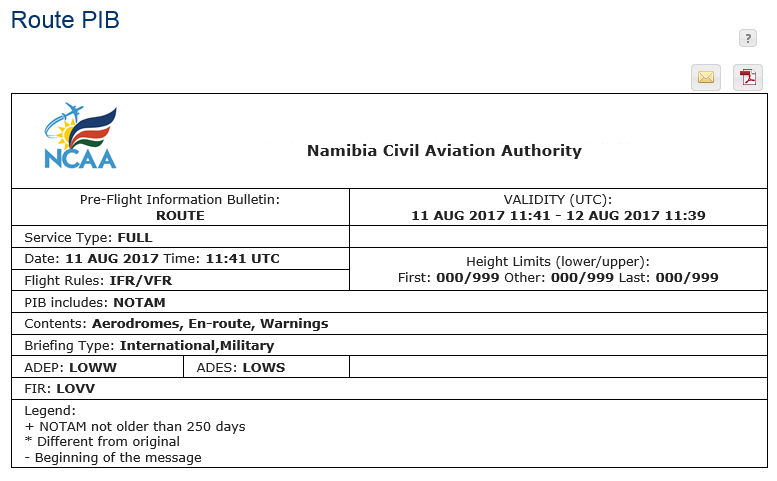
Example of a route PIB
Step 7 (optional: send PIB in email)
The PIB can be
sent via e-mail. To send the PIB to one or more e-mail recipients, click
the mail symbol (![]() ). The Email addresses
dialog opens:
). The Email addresses
dialog opens:
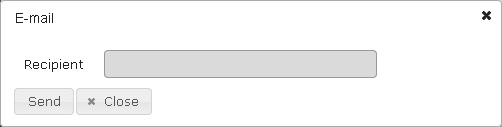
Send PIB via e-mail
When entering multiple e-mail addresses in the Recipient field, separate each one by a semicolon (;). Do not include any spaces.
Step 8 (optional: generate PDF)
The
PIB can be exported to a PDF file by clicking on the PDF symbol (![]() ).
).